Navigating the world of cloud computing can feel like trying to learn a foreign language at times. With so many services, configurations, and options, figuring out how much you’re going to spend on Amazon Web Services (AWS) can be a daunting task. Whether you’re an individual developer launching your first app or a large corporation shifting an entire infrastructure, budgeting for cloud resources is vital. This is where the AWS Pricing Calculator comes in handy.
Amazon Web Services offers a plethora of tools and services, tailored for almost every conceivable use case. But the sheer versatility that AWS provides can sometimes be a double-edged sword, especially when it comes to estimating costs. Do you know how much data transfer you’ll need? How about the number of read and write requests? The combinations seem endless, and it’s easy to see why so many get lost in the labyrinth of AWS pricing.
Navigate to the AWS Price Calculator Page
Go to the official AWS Pricing Calculator page by visiting the following URL: AWS Price Calculator
Once you’ve accessed the AWS Pricing Calculator page, you will encounter several features and components:
- Dashboard: An overview where you can see saved cost estimates, if any, and start new estimates.
- Add Products: A button or section where you can select and add AWS services to your estimate. Each service will have its own set of configurations and parameters.
- Estimate Configuration: After adding a product/service, you will be prompted to configure its parameters. This could include specifying regions, instance types, quantities, data transfer amounts, storage options, and other specifics.
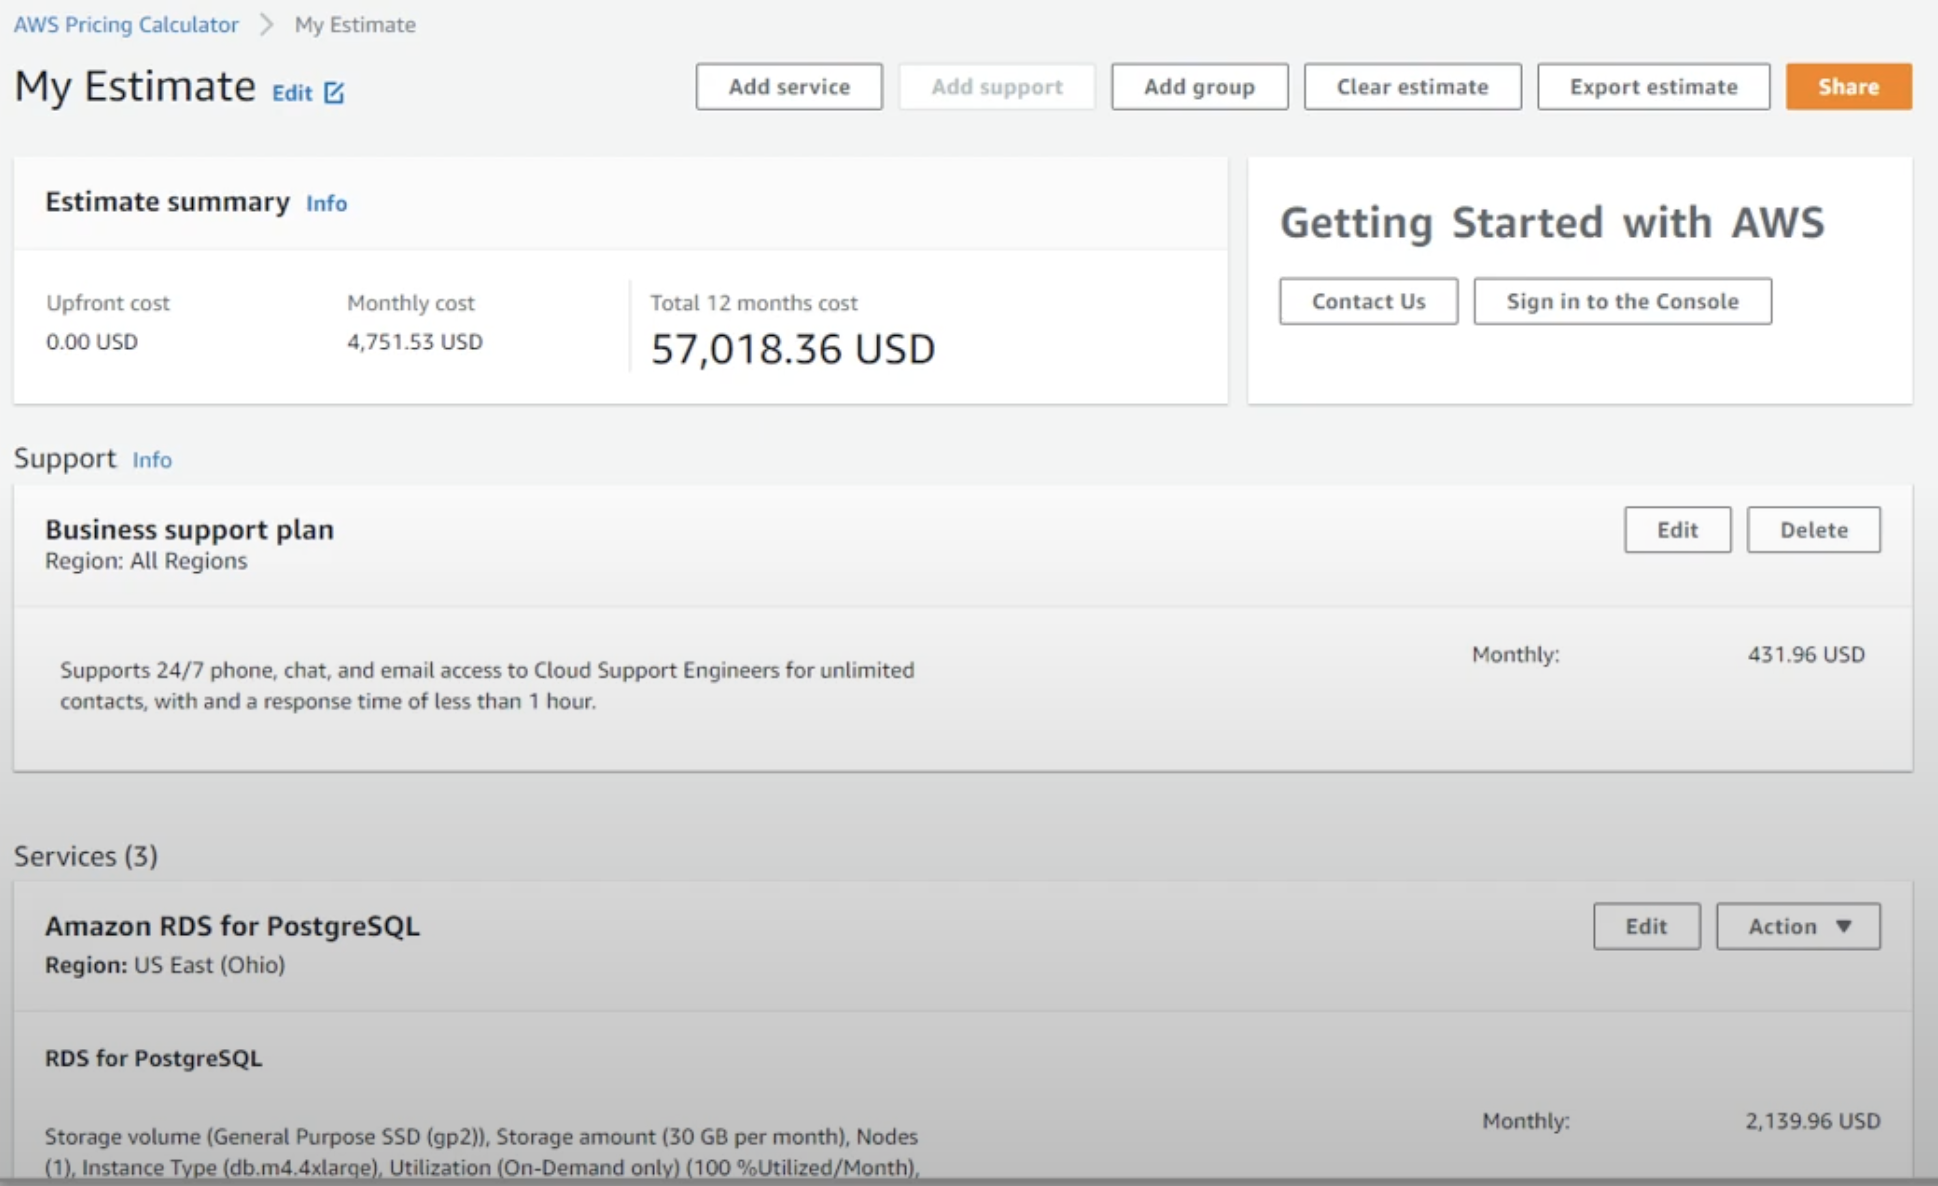
- Monthly Estimate: A running total will be displayed, showing your estimated monthly cost based on the products and configurations you’ve selected. As you make changes, this estimate will update.
- Cost Breakdown: Detailed breakdown of the costs, often with graphs or charts to visually represent where your estimated expenses are coming from.
- Save and Share Options: Tools or buttons that allow you to save your current estimate for future reference or to share it with others through a link.
- Optimization Recommendations: Some suggestions or tools to optimize your costs might be presented, offering ways to save money based on your chosen configurations.
- Resources and Documentation Links: Links to AWS documentation, FAQs, or other resources that can help you understand and navigate the pricing complexities.
Choose Your Products
Here’s a detailed guide on how to choose products within the AWS Price Calculator:
Choosing Your AWS Products:
- Start on the AWS Price Calculator Dashboard: Once you’re on the AWS Pricing Calculator page, you’ll typically be presented with an overview or dashboard view.
- Locate the ‘Add Products’ Section: Look for a button, tab, or section labeled “Add Products,” “Start new estimate,” or something similar.
- Click to Add Products: Clicking on this button or section will open up a comprehensive list of AWS services and products available for estimation.
- Browse Through Categories: AWS services are organized into various categories such as “Compute,” “Storage,” “Databases,” and more. Browse through these categories if you’re looking for a specific type of service.
- Search for Specific Services: If you already know the name of the service you’re interested in, use the search bar or function to quickly locate it.
- Select the Desired Service: Once you find the service or product you’re interested in, click on it. This will add it to your estimate. Some services might prompt you to make initial configuration choices at this stage, such as selecting a region.
- Add Multiple Products: If your project requires multiple AWS services, repeat steps 4-6 for each additional product you want to include in your estimate.
- Review Selected Products: Once you’ve added all the desired services, they should appear in a list or summary view on your estimate. Here, you can see each service’s name and some primary configuration options. You’ll be able to dive deeper into specific configurations in subsequent steps.
- Proceed to Configuration: After selecting all necessary products, you can move on to configuring each product’s specific details, such as instance type, data usage, storage, and more, to get an accurate cost estimate.

View Your Estimate
Here’s a detailed guide on how to view your estimate within the AWS Price Calculator:
Viewing Your AWS Cost Estimate:
- Stay in the AWS Price Calculator Dashboard: After selecting and configuring your desired AWS products, you should still be on the AWS Pricing Calculator page.
- Locate the Estimate Section: On the dashboard, there’s a section or panel, often labeled as “Your Estimate,” “Estimated Cost,” or something similar. This section provides a summary of the costs associated with the products and configurations you’ve selected.
- Review the Monthly Estimate: At a glance, you should see a “Monthly Estimate” or “Total Monthly Cost” prominently displayed. This is a calculated estimate based on the services, configurations, and usage parameters you’ve inputted.
- Breakdown of Costs: Beneath or alongside the total monthly estimate, there’s typically a detailed breakdown that lists each AWS service you’ve added. Next to each service name, you’ll see the estimated monthly cost for that particular service.
- Visual Representations: The calculator might include visual aids, such as graphs or pie charts, to depict where your costs are coming from, allowing you to quickly understand which services or configurations are the most expensive.
- Toggle Options: Some advanced configurations or scenarios may allow you to view estimates on different timelines, such as daily, monthly, or yearly costs. If available, use toggle options or dropdown menus to adjust the view.
- Adjust and Update: If you alter any product configurations, watch for automatic updates in your estimate. The calculator should dynamically adjust the numbers as you make changes, giving you real-time feedback on how each change impacts the cost.
- Additional Costs and Notes: Be sure to review any notes, disclaimers, or additional cost details provided. Some costs might be region-specific, or there could be potential additional charges based on certain usage patterns or overages.
- Save or Export: Once you’re satisfied with the estimate, look for options to save it for future reference or to export it, often in formats like CSV or PDF. This can be helpful for budgeting, presentations, or sharing with team members.
Keep in mind, AWS is continually evolving, and the user interface or specific features of the AWS Pricing Calculator might change over time.
Conclusion
The AWS Pricing Calculator is an indispensable tool for businesses and individuals leveraging Amazon Web Services. It offers a transparent way to forecast costs associated with AWS’s myriad of services. By allowing users to select, configure, and view estimates for their intended AWS product usage, the calculator aids in budgetary decisions and helps avoid unexpected expenses. As with any tool, its effectiveness depends on accurate user input, so always ensure you thoroughly understand your project’s requirements and potential usage patterns. Remember, while the calculator provides a solid estimate, always stay informed of the latest pricing details and promotions directly from AWS to make the most cost-effective decisions.
